And we’re back! Last week we covered the basics of Spiral Ducting, from attaching the support wire and spacing options to the various materials we can use to create the duct itself. Now we’re going to explore the final step in creating the perfect duct for you; the finishing options.
Ducting Styles, Options, and Connectors
Each ducting finishing option is created to make your spiral ducting as handy as possible. Below we will go into detail about what each ducting style, option and connector has to offer.
- Belt Cuff – Being the easier cuff to use, the end of the duct features an enclosed pocket with a fabric strap through it and is finished with an alligator clip. When securing, the strap is fed through the clip and pulled tight.
- Soft Cuff – Designed with simple finishing, the soft cuff is simply a folded edge of fabric. There are no supports or connection methods included in it; it is simply a fabric finish to the end.
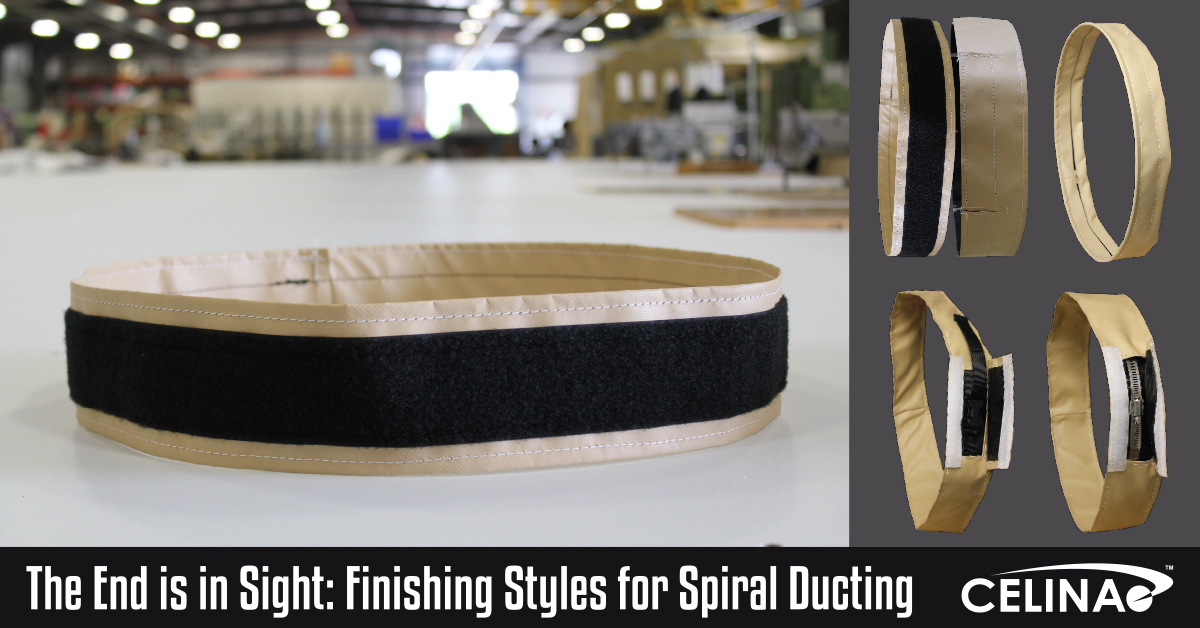
- Hook & Loop Cuff – This finishing aspect requires the opposite connection to be installed on the duct, vent, or machine that the duct is connected to. One side has a strip of loop connector sewn to it, on the outside of the duct. The end with the loop is the “exit end” of the air flow. The opposite connector has a flap to which the hook fastener is sewn; this is placed over the loop fastener to secure it in place and create the seal between ducts.
- Screw Clamp Cuff – Similar to the Belt Cuff, the Screw Clamp Cuff has the enclosed pocket with a metal band running through it. The band is tightened by turning the screw on the clamp, using a simple screwdriver.
- Zipper Cuff – Zipper cuffs are similar to the Hook and Loop Cuff because once again, both ends need to have the correct side of the cuff; meaning each end of the connection needs to have zipper teeth attached to it, with one end having the pull tab for closing the zipper.
- Wire Rope Coupling – A closed fabric pocket is sewn to the end of the duct, with a ring of wire rope secured on the inside. Wire Rope Coupling is used to connect to other Wire Rope Coupling finished ends. To connect them, one end of the coupling is put inside the other duct end (wire rope and all). Special coupling assemblies are used to clamp the two wire rings together from the outside, securing the ducts together.
Paying Attention to the Details
All finishing styles can be mixed and matched on your duct, letting you connect any items you like. This brings us back to the cautionary note from last week; when organizing your duct connections, remember which direction the air will be flowing. Most finishing options have one side of the duct (outer) wrapped around the other side (inner); just like how the inside of the duct can have a lip that catches air, if your air flows into the connection’s inner end you may have more break in the air flow. Try and have all air flowing out of the end that is inserted into the connection area, just to keep the air free from any breaks in the smooth walls.
Once you have the finishing styles for your ducts matching for your installation, you’re good to go! While it sounds like a lot of info to take in, there’s no substitute for getting a job right the first time. When you go to order a duct:
- Know what it’s going to be used for
- Pick appropriate material
- Decide is Wear Stripping is right for you
- Choose your finishing
And you’ll be well on your way to an easy and simple duct installation. For more information on air flow technologies, or to find out our quick and easy ordering options, contact us at (888) 324-0654 or by emailing Sales@CelinaIndustries.com.


